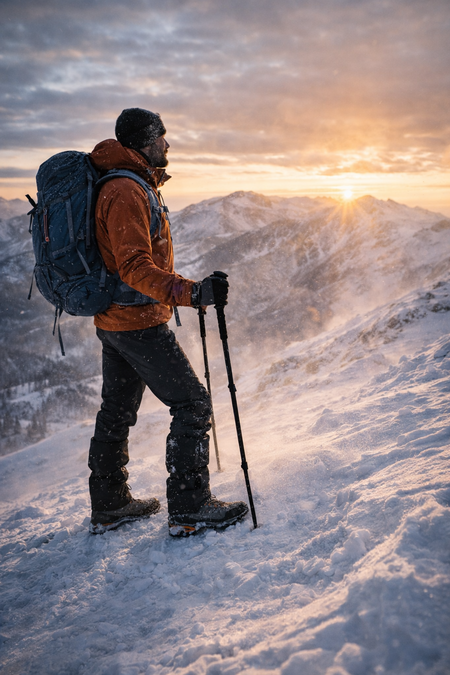
How to Keep Food Fresh While Camping: Coolers, Containers & Tips
Nothing enhances the outdoor experience quite like enjoying fresh, delicious food after a day of adventure. However, maintaining food freshness away from refrigeration presents unique challenges for campers and backpackers. Whether you're planning a weekend car camping trip or an extended backcountry expedition, proper food storage is essential for both safety and enjoyment.
In this comprehensive guide, we'll explore the best methods, equipment, and techniques to keep your food fresh while camping.
Why Food Freshness Matters in the Outdoors
Before diving into specific strategies, it's important to understand why proper food storage deserves your attention:
- Safety: Preventing foodborne illness should be your top priority in the wilderness, where medical help may be hours away.
- Waste reduction: Properly stored food stays edible longer, reducing the amount you need to pack out as waste.
- Wildlife protection: Secure food storage protects wildlife from developing harmful dependencies on human food.
- Budget efficiency: Maximizing food freshness means less wasted money on spoiled supplies.
- Enhanced experience: Fresh ingredients elevate your camp kitchen experience from merely sustaining to truly enjoyable.
With these benefits in mind, let's explore the essential tools and techniques for keeping your food fresh in the great outdoors.
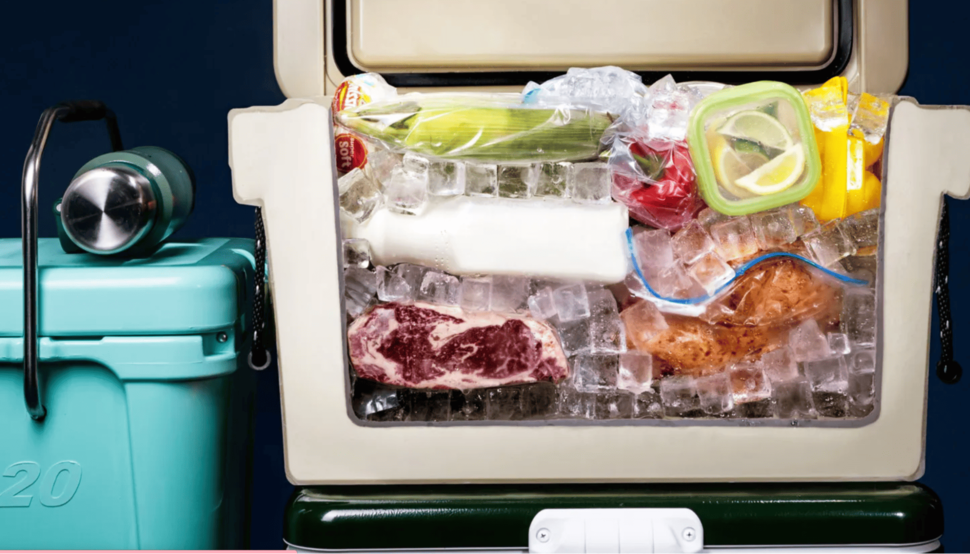
Coolers: Your First Line of Defense
Selecting the Right Cooler
![]()
The market offers numerous cooler options, from budget-friendly styrofoam models to high-end rotomolded versions costing hundreds of dollars. Your selection should consider:
- Trip duration: Longer trips require better insulation performance.
- Weight and portability: Consider how far you'll need to carry your cooler.
- Capacity needs: Estimate your food and beverage requirements based on group size.
- Climate conditions: Hotter environments demand superior insulation.
For weekend car camping trips, a mid-range hard cooler with 3-5 days of ice retention offers an excellent balance of performance and value. For serious expeditions or hot weather, investing in a premium rotomolded cooler with 7-10 days of ice retention may be worthwhile. These coolers complement your other essential camp kitchen equipment perfectly.
Optimizing Cooler Performance
Even the most expensive cooler won't perform well without proper preparation and usage:
- Pre-chill your cooler: Store your empty cooler with ice packs for 12-24 hours before your trip.
- Use block ice: Block ice melts more slowly than cubes—freeze water bottles or make your own ice blocks in containers.
- Cold loading: Only place pre-chilled food and drinks in your cooler.
- Strategic packing: Place items you'll need first on top, avoiding unnecessary opening and digging.
- Maintain ice-to-food ratio: Aim for 2:1 ice to food volume for optimal cooling.
- Minimize openings: Each opening lets cold air escape—plan ahead to reduce frequency.
- Location matters: Keep your cooler in shade, cover with a reflective blanket, or even partially bury it in cool soil.
With these strategies, even a moderately priced cooler can maintain freshness for several days.
Food Containers: Beyond the Cooler
While coolers handle refrigerated items, proper containers protect dry goods and perishables alike.
Dry Food Storage Options
For items like pasta, rice, cereal, and spices, consider:
- Reusable silicone bags: Lightweight, compressible, and environmentally friendly.
- Sealed plastic containers: Protect against moisture and crushing.
- Vacuum-sealed bags: Pre-portion ingredients to minimize waste and exposure.
- Screw-top containers: Ideal for liquids and items requiring airtight seals.
The right containers enhance your overall camp kitchen organization and complement your cookware and dishes systems.
Specialized Food Containers
For specific food preservation challenges, consider these specialized options:
- Bear canisters: Required in many wilderness areas, these protect your food and wildlife.
- Insulated food flasks: Keep hot foods hot or cold foods cold for 4-6 hours.
- Mesh produce bags: Allow airflow for fruits and vegetables while providing protection.
- Crushproof containers: Protect delicate items like eggs or soft fruits.
Many of these containers are available as kitchen accessories designed specifically for outdoor use.
Smart Food Selection for Extended Freshness
Foods That Travel Well Without Refrigeration
Some foods naturally resist spoilage without refrigeration:
- Hard cheeses: Aged cheddar, parmesan, and gouda can last several days unrefrigerated.
- Cured meats: Salami, pepperoni, and jerky provide protein without refrigeration.
- Root vegetables: Carrots, potatoes, and onions remain fresh for days in cool, dark conditions.
- Citrus fruits: Oranges, lemons, and limes have natural protective skins.
- Nut butters: Provide calorie-dense nutrition with extended shelf life.
- Tortillas: More durable than bread and versatile for many meals.
- Shelf-stable milk alternatives: Boxed coconut, almond, or oat milk until opened.
For more ideas on essential food and drink supplies for camping, explore our campsite cooking collections.
Preserving Perishables
For items requiring refrigeration, consider these preservation strategies:
- Freezing as ice packs: Frozen meats and prepared meals double as ice substitutes.
- Vacuum sealing: Removes air that accelerates spoilage.
- Oil packing: Covering items like cheese in olive oil creates a protective barrier.
- Separation strategy: Keep raw meats separate from ready-to-eat foods.
Meal Planning for Food Freshness
The "Eat This First" Approach
Strategic meal planning significantly impacts food freshness:
- First day foods: Plan to consume the most perishable items (fresh meat, dairy, soft fruits) during the first 24-48 hours.
- Mid-trip transition: Shift to items with moderate shelf life (hard cheeses, eggs, hardier vegetables).
- End-of-trip staples: Rely on shelf-stable options (dried foods, canned goods, dehydrated meals) for the final days.
As mentioned in our Ultimate Camp Kitchen Checklist blog, proper meal planning reduces waste and ensures you have the right cookware for each meal.
Batch Cooking and Portioning
Prepare strategically to maximize freshness:
- Pre-cook and freeze meals that will thaw during your trip.
- Portion ingredients into single-meal quantities to minimize repeated exposure.
- Consider partially cooking items that can be finished on your camp stove.
Temperature Management Beyond Coolers
Natural Cooling Methods
When traditional coolers aren't practical:
- Evaporative cooling: Wrap items in wet cloth and hang in breezy shade—works best in dry climates.
- Stream cooling: Secure waterproof bags in flowing water (where permitted).
- Night cooling: Utilize cooler nighttime temperatures by exposing food to night air and insulating during day.
- Dig storage: Soil temperatures below 12-18 inches remain relatively stable and cool.
These methods pair well with specialized camp kitchen equipment designed for backcountry use.
Hot Weather Food Safety
In extreme heat, additional precautions become necessary:
- Timing matters: Cook and consume perishable foods immediately after removing from cooling.
- Two-hour rule: Discard perishable foods left in temperatures above 90°F (32°C) for more than two hours.
- Color and odor monitoring: Trust your senses—discard any food with off colors or smells.
- Over-planning: Bring extra shelf-stable backup meals in case food spoilage occurs.
Having the right utensils for camp cooking helps maintain food safety during preparation.
Wildlife Considerations and Food Storage
Animal-Resistant Storage Methods
Different environments require different wildlife protection approaches:
- Bear country: Use certified bear canisters or properly hung bear bags.
- Rodent-prone areas: Store food in hard containers, not tents or backpacks.
- Developed campgrounds: Secure food in vehicles or provided storage lockers.
- Water-adjacent sites: Protect against raccoons and other dexterous creatures with lockable containers.
Remember, protecting wildlife from human food access is both a safety and conservation priority.
Proper Food Hanging Techniques
For areas where hanging food is appropriate:
- Find a suitable branch at least 10 feet high and 4 feet from the trunk.
- Use the counterbalance method: divide food into two equal bags connected by a rope over the branch.
- Raise until the connecting point is at branch level, with bags hanging equally.
- Maintain at least 4 feet clearance from ground and branch.
Minimizing Food Waste in the Backcountry
Packing Out Food Waste
Leave No Trace principles require bringing out what you bring in:
- Use dedicated odor-proof bags for food scraps and packaging.
- Consider compostable bags for food waste when appropriate.
- Never bury food waste, which attracts wildlife and disrupts ecosystems.
Repurposing Techniques
Creative reuse of ingredients reduces waste:
- Transform dinner leftovers into breakfast additions.
- Use vegetable scraps for trail soups or stews.
- Repurpose stale bread as croutons or bread pudding.
High-Tech Food Preservation Options
For serious outdoor enthusiasts, technological solutions offer additional options:
- Portable vacuum sealers: Battery-powered models extend food life by removing air.
- UV water purifiers: Ensure safe water for food preparation.
- Solar-powered refrigeration: For extended base camping or vehicle-based adventures.
- Freeze-dried meal systems: Combine with fresh ingredients for balanced nutrition.
These advanced options complement traditional preservation methods when extended trips or extreme conditions demand more sophisticated solutions.
Season-Specific Food Storage Strategies
Summer Challenges
Hot weather demands extra vigilance:
- Double your ice estimates.
- Consider multiple smaller coolers used sequentially.
- Rely more heavily on dry goods and shelf-stable options.
- Plan shorter intervals between resupply opportunities.
Winter Advantages
Cold environments offer natural refrigeration:
- Use snow banks as natural coolers.
- Protect food from freezing when necessary.
- Insulate water to prevent freezing.
- Account for increased caloric needs in cold weather.
Conclusion: Balancing Safety, Sustainability, and Enjoyment
Keeping food fresh while camping is both art and science. By combining appropriate equipment, thoughtful planning, and time-tested techniques, you can enjoy safe, delicious meals regardless of your outdoor adventure style. Remember that different trips require different approaches—a weekend car camping trip allows for more luxury than a week-long backpacking adventure.
Start with the basics: a quality cooler, appropriate containers, and smart food selection. Add specialized techniques as your outdoor cooking skills develop. Most importantly, prioritize food safety while minimizing environmental impact.
With these strategies in your outdoor cooking toolkit, you'll transform camp meals from a basic necessity into a highlight of your wilderness experience. Your camp kitchen will become a place where practicality meets creativity, and where fresh, delicious food enhances every outdoor adventure.
Leave a comment
Recent articles
View all
The Complete Guide to Choosing Hiking Socks: Materials, Cushioning, and Fit for Blister-Free Miles
GORE-TEX vs Non-GORE-TEX Hiking Boots: Understanding Waterproof Technologies and When You Need Them